
Building a Homemade Thumb Splint: A Step-by-Step Tutorial
Thumb injuries can happen unexpectedly — from a sudden strain while lifting groceries to overuse from texting or gaming. In those moments, a homemade thumb splint can offer temporary relief and protection until you can get professional care or a proper medical brace.
In this guide, we’ll walk you through how to create a basic thumb splint at home using simple materials — and when you should consider upgrading to a more supportive solution.
⚠️ Before You Begin: Know When to Seek Medical Attention
Homemade splints are best used only for minor sprains or temporary support. If you suspect a fracture, dislocation, or severe ligament damage (like skier’s thumb or De Quervain’s tenosynovitis), we will always first recommend seeking medical help. Improper immobilization could worsen your condition.
What You'll Need

- A clean popsicle stick, tongue depressor, or plastic spoon
- Medical tape or self-adhesive bandage
- Soft padding (e.g. gauze, cotton, or a folded tissue)
- Optional: scissors
Step-by-Step Instructions
1. Position the Thumb
Rest your hand palm-up. Gently extend your thumb outward (not forcing it) into a comfortable, neutral position — not too straight, not bent.
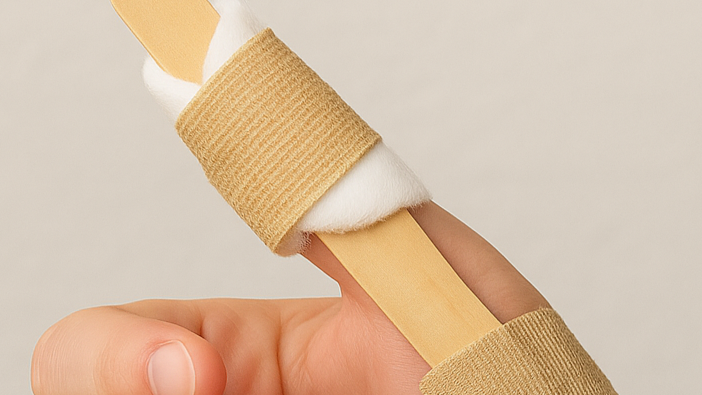
2. Add Padding
Wrap a layer of gauze or cotton around your thumb, especially at pressure points. This protects your skin from irritation and improves comfort.
3. Apply the Splint
Place the stick or plastic spoon along the underside or side of your thumb, depending on where support is needed. Make sure it doesn’t block blood flow or pinch nerves.
4. Secure with Tape
Wrap medical tape or a self-adhesive bandage around the splint and thumb to hold everything in place. Start from the wrist and work toward the thumb tip. It should feel snug but not tight.
5. Test the Fit
Try light movement of your other fingers. If the splint shifts or causes pain, adjust the wrap or add more padding.
When to Switch to a Medical-Grade Thumb Splint
Homemade splints are temporary. For longer-term support, proper healing, and targeted relief, a well-designed medical splint offers far better outcomes.
BetterSpine offers a full range of thumb support options — from thumb spica splints for immobilization to lightweight compression sleeves for daily relief.
Final Tips
- Avoid wearing a homemade splint for more than 1–2 days without consulting a healthcare provider.
- Watch for increased swelling, numbness, or discoloration — these are signs to remove the splint and seek help.
- Keep the splint clean and dry.
Supporting your recovery starts with the right care. Use this tutorial for quick at-home support, but don’t hesitate to upgrade when your thumb needs more.